Beginner's Guide
Using Your Telescope - Accessories

|
|
Various Accessories |
What we will cover
We dedicate this section of the beginner's guide to using your scope. Here will will offer guidance, tips, and discuss some of the must have and some nice to have accessories to help you. If you're the kind of person who loves gadgets, you'll be more than fine with this. But if you're the person who just wants to point that telescope into the sky and see amazing sights, we do feel your pain. However, some of these accessories will make things much easier. But we'll do more. We will also offer advice to make for a better observing experience and the only cost is the time to learn.
Get a star atlas
A paper star atlas? Unfortunately we need to address that question because we live in an age where most everything is available electronically and specifically digitally. We aren't trying to talk you out of anything digital because we have suggested a few digital resources, but we do need to point out the advantages of a standard star atlas.
- It is easy to write and make notes on a paper atlas.
- With a red light to read, you can easily retain your dark adaption. That is often difficult to impossible on a digital device.
- Though all the data on these paper atlases may be digital and initially created by digital means, they have been corrected by master chart makers. In many areas there are a lot of stars or objects and the labeling can easily get in the way. A map maker will do their best to label everything as unobtrusively as possible.
- The printed star atlases are generally much larger than the computer screen you'd be using during an observing session. This is not as much an issue on a desktop computer with a large screen. It is much easier to browse.
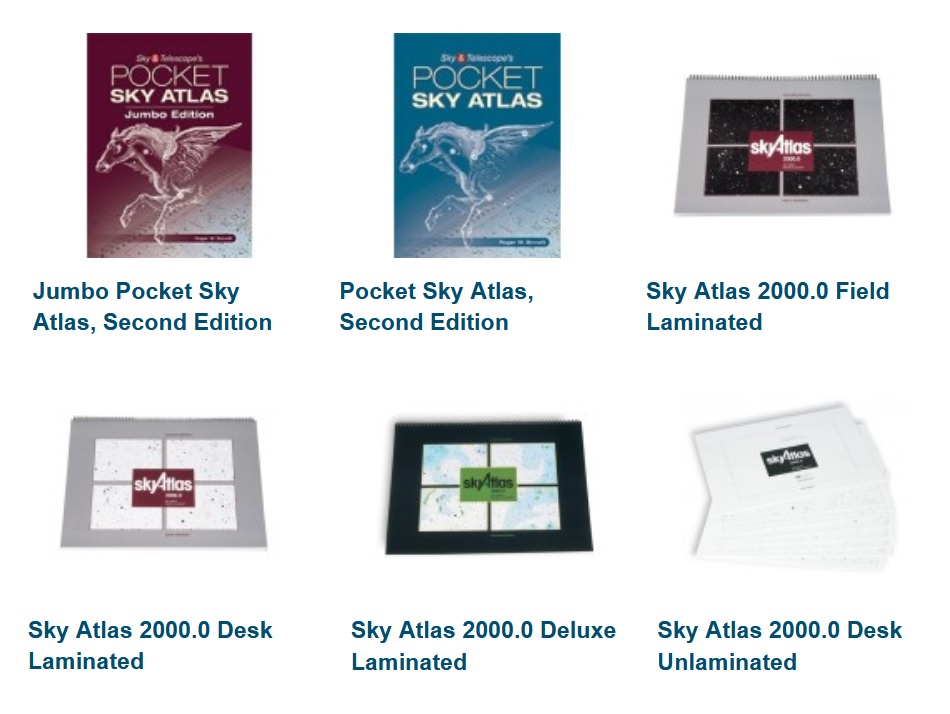
Sky & Telescope - Pocket Sky Atlas
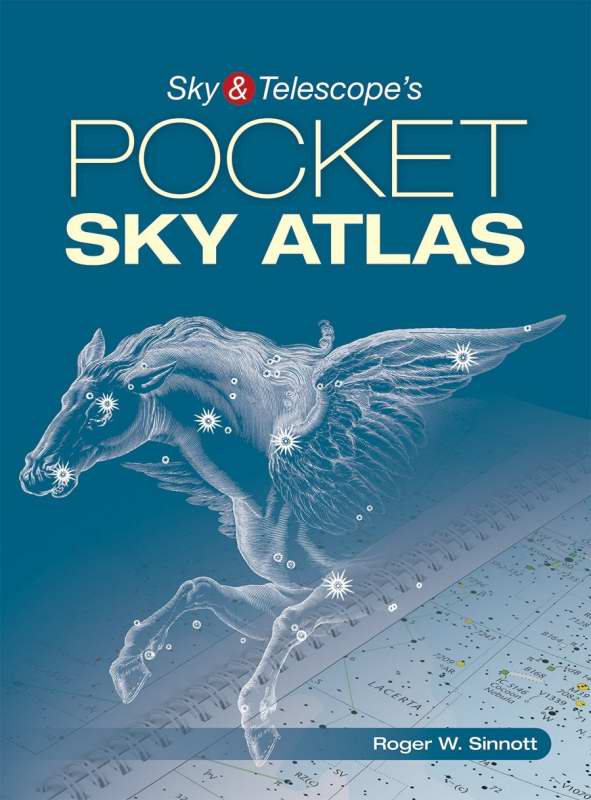
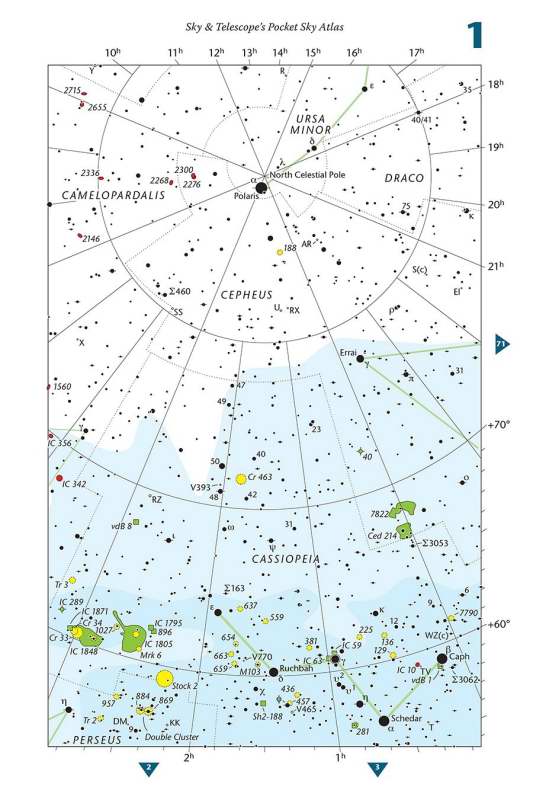
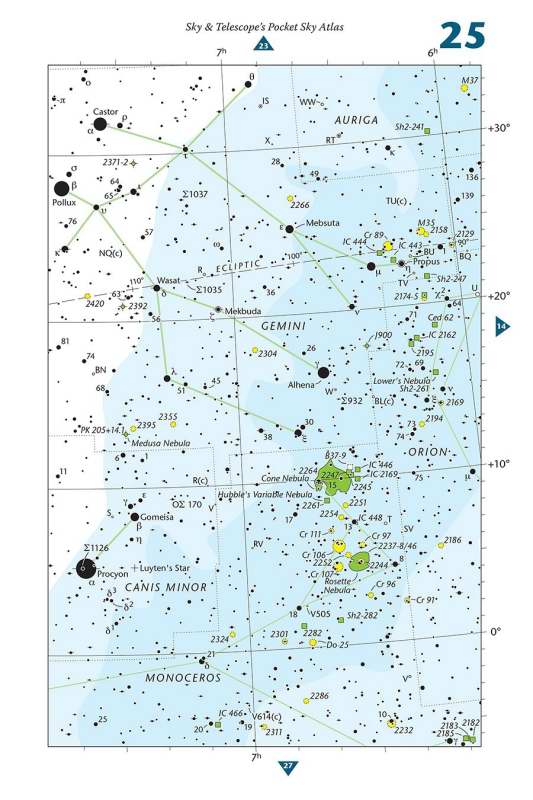
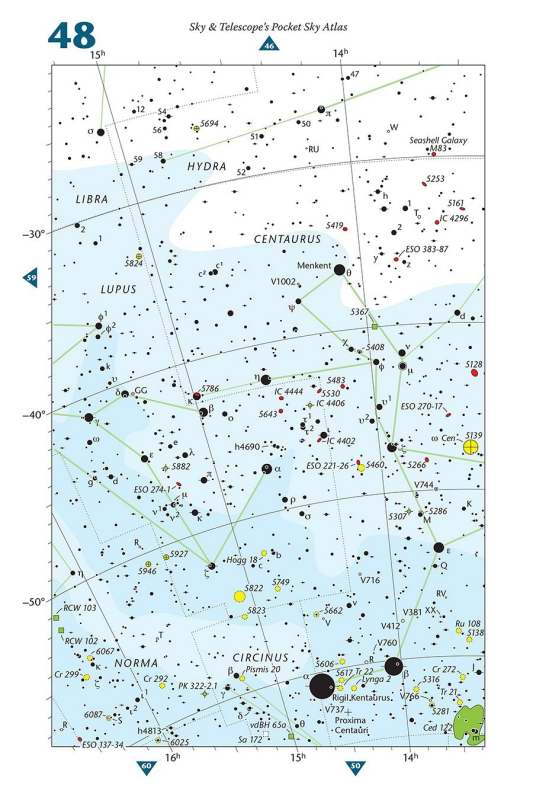
The Sky and Telescope Pocket Atlas is good from beginners to advanced observers so you will want to keep it indefinitely. You can tell just by the name that it is a smaller atlas aimed at being portable and easily used at the telescope. It comes in two editions: Standard and Jumbo. The standard one is 7X9" and the jumbo is 9X12". Here are the features of this atlas:
- Contains 80 charts with cover the entire sky with 10 close-up charts.
- 7.6 magnitude limit which corresponds fairly well with what you see with binoculars or a 8X50 finder scope.
- 30,000 stars
- 1,500 deep-sky objects color-coded by type, including 675 galaxies oriented as they are in the sky.
Sky & Telescope - Sky Atlas 2000.0
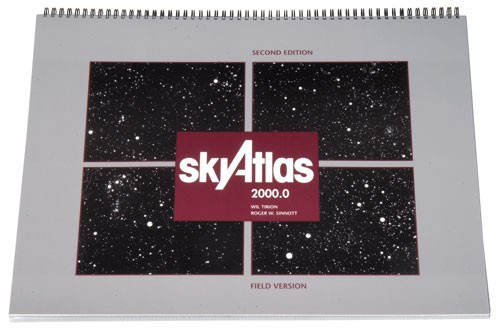
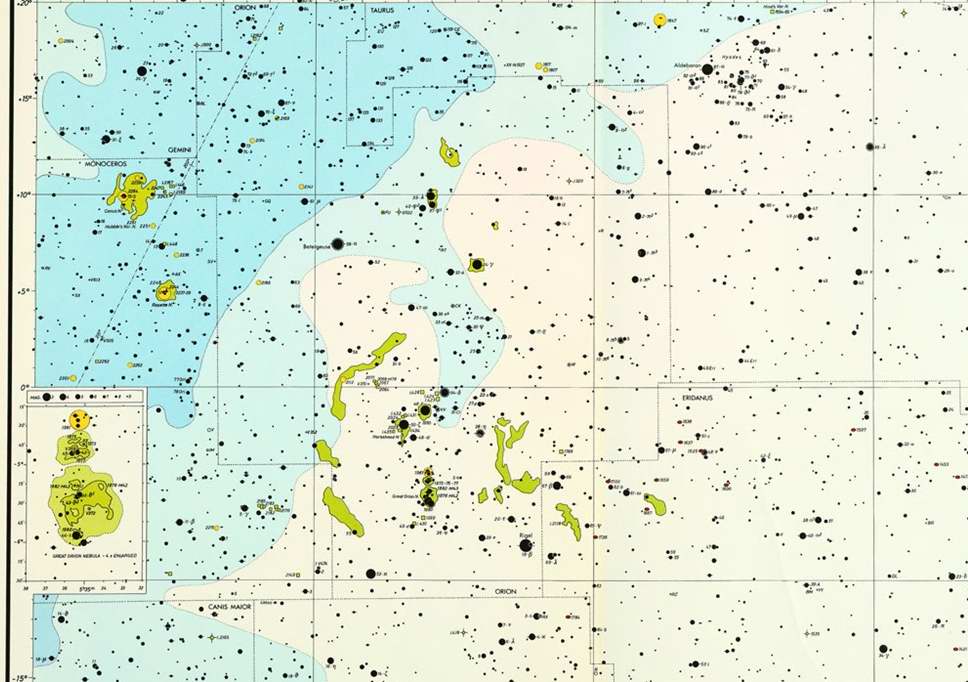
Here's the description from Sky & Telescope: "Sky Atlas 2000.0 contains 26 large charts covering the whole sky, showing 81,312 single, multiple, and variable stars down to magnitude 8.5 and 2,700 of the best deep-sky objects scattered among them. Includes closeup charts of special areas such as the celestial poles and the Virgo-Coma galaxy region. This is the next step up from our Pocket Sky Atlas -- and a must for every serious telescope user!"
There are 4 versions.
- Sky Atlas 2000.0 Field Laminated - Stars and deep-sky objects are white on a black background, 18.5 x 13.5 inches, spiral bound along the top, and plastic laminated.
- Sky Atlas 2000.0 Desk Laminated - Stars and deep-sky objects are black on a white background, 18.5 x 13.5 inches, spiral bound along the top, and plastic laminated.
- Sky Atlas 2000.0 Desk Unlaminated - Stars and deep-sky objects are white on a black background, 18.5 x 13.5 inches, unbound and printed on heavy paper.
- Sky Atlas 2000.0 Deluxe Laminated - Deep-sky objects are color-coded by type for easy identification. Larger edition at 21 x 16 1/4 inches, spiral bound along the top, and all pages are laminated in waterproof plastic.
Red Light Flashlight

A red flashlight is an essential accessory that every astronomer should have. At night when at your telescope (or binoculars) you will need to navigate, find your charts, read your charts, find eyepieces, make adjustments, etc. But how do you do this without ruining your dark adapted eyes? That's where the "red light" comes in. Red light is the best at maintaining your night vision.
We show 4 different commercial red light flashlights above which we recommend, but there are many others available and you should do a web search because another model may be a better fit for your needs. Also, there is a simple DIY solution of putting a red filter in front of your flashlight.
Barlows

A Barlow is almost a magical telescope accessory in that in increases the power of an eyepiece by 2X, 3X, or more depending on the model. Though this comes at a bit of performance cost, it's an accessory almost any amateur purchases to have in their tool kit. The Barlow goes into the eyepiece holder and then your chosen eyepiece goes into the Barlow.
Here's how it works - a 2X Barlow example:

The diagram shows the real objective lens (shown in blue) with the light bending to the focal point where the eyepiece would be normally. But the Barlow lens gets inserted before the focal point. A Barlow is a negative lens so it extends the light path past the original focal point. So to the eyepiece it appears that the focal length has changed, in this case the objective is effectively 2 times as far. Therefore, the "new" focal length is twice that of the original. So now any eyepiece inserted behind the Barlow will magnify twice as much. If you are using a 3X Barlow, you would triple the magnification.
You should notice that the new eyepiece position is considerably higher when you're using a Barlow because it's necessary to accomplish focusing.
Eyepiece Selection
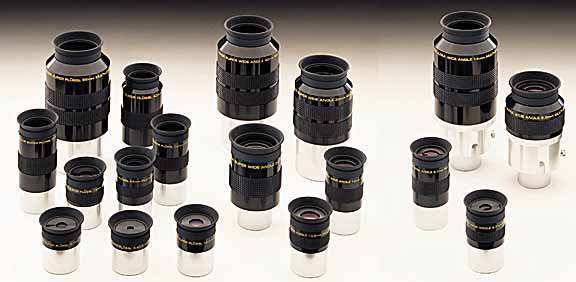 The main goal of any telescope eyepiece is to form a sharp image, focusing the light rays collected by a telescope.
Difficulty in choosing the right eyepiece is also related to the telescope's focal ratio - the smaller the focal ratio of your telescope,
the better eyepiece you should use. For example, with an f/10 telescope you can use almost any decently made telescope eyepiece
and you will obtain quality, sharp views. But if you use an f/4 instrument, you have to combine it with only the best examples of
modern optical systems in order to achieve image clarity across the entire field of view.
The main goal of any telescope eyepiece is to form a sharp image, focusing the light rays collected by a telescope.
Difficulty in choosing the right eyepiece is also related to the telescope's focal ratio - the smaller the focal ratio of your telescope,
the better eyepiece you should use. For example, with an f/10 telescope you can use almost any decently made telescope eyepiece
and you will obtain quality, sharp views. But if you use an f/4 instrument, you have to combine it with only the best examples of
modern optical systems in order to achieve image clarity across the entire field of view.
At this point it would be good if you read through our page about eyepieces if you have not already done so. And you probably will want to refer back to it even if you did.
Eye Relief
Eyepiece optical design determines its eye relief (distance from the eyepiece lens to the eye of the observer with a clear image). An observer who wears eyeglasses will need about 15-20mm eye relief value in order to see the entire field of view of the eyepiece. In traditional optical designs, eye relief is proportional to focal length: the shorter the focal length, the shorter the eye relief. However, some modern eyepieces offer an excellent eye relief at short focal lengths.
Apparent and Real Field of View
Eyepiece optical design also determines its apparent field of view. The apparent field of view is the angular diameter of the circle of light seen by the human eye expressed in degrees. Most conventional eyepieces have 40-50° apparent fields of view. The true field of view (the angular diameter of the sky area visible through the eyepiece) can be found by dividing the apparent field of view by the magnification of the telescope with this particular eyepiece. Let's suppose that we have a telescope with an aperture diameter of 200mm, a focal length of 2000mm, and a 20mm eyepiece with a 50° apparent field of view. In this case the magnification will be 2000mm / 20mm = 100x, and the true field of view equals 50° / 100x = 0.5° (which is one angular diameter of the full moon).
Eyepieces with earlier optical designs like Huygens and Ramsden can have an apparent field of view of just 30°. Newer eyepieces have 60° and even more. If you switch from a 30° eyepiece to a 60° eyepiece at the same magnification, you will be able to see a field of view that is twice as wide, which means it's 4 times the area! That's why some observers spend a lot of money on wide-angle eyepieces that provide "spaceship porthole" views.
Review of Telescope Basics
For further discussion about eyepiece selection, we need to talk about that basic image formed by your telescope's objective lens.

Light bulb image source.

Magnifying glass and light bulb projected.
The projected image size will depend of both the size of the objective and the focal length of that objective. A longer focal length produces a larger image, and the image quality does not deteriorate as much as you move to the outside edges as it does with a short focal length. The sharpest view is always at the very center. The brightness of the projected image will depend on the aperture. A larger objective naturally produces a brighter image. The image definition will depend on the quality of that objective. But after that it will depend on the quality of the incoming light. Our atmosphere is normally turbulent to varying degrees. The more turbulent the condition, the image quality deteriorates. We call this astronomical seeing. Finally, turbulence can be created by the telescope tube itself when the telescope is first set up if it was stored in a warm place and now sitting in a cooler environment. All of these things come into play when you're choosing the eyepiece.
Low Magnification
The beginner is apt to not even think of low magnification since the whole purpose of telescope is to magnify and as such, more must be better. However, having said that even 25X which is very low power for a telescope, is still significant. It's 3 times 8X which is a common magnification for binoculars. Lower magnification has a couple of important functions. The first one is it's extremely useful and sometimes absolutely necessary to find your target object. Higher and higher magnification means you're seeing a smaller and smaller piece of the sky. Once your target has been found, then you may want to increase the magnification for a better view. The second reason is that some objects (and fields) are viewed better with low power.
So if low can be very good you need to know that too low may not be desirable. What comes into play is the concept of the exit pupil which is simply the cone of light coming from your eyepiece that then enters your eye through your pupil. If that cone of light is wider than your pupil, you are losing some of the light. It's effectively as if you're looking through a telescope with a smaller aperture! So when you're buying a lower power eyepiece for your telescope, you need to calculate the exit pupil that will result.
The exit pupil for a given eyepiece is the diameter of the objective divided by the magnification of that eyepiece. And of course magnification is the focal length of the objective divided by the focal length of the eyepiece. So the forumla is:
Do × fe ÷ fo = Dep
Where: Dep is the diameter of the exit pupil, Do is the diameter of the objective, fe is the focal length of the eyepiece, and fo is the focal length of the objective.
You will need to compare that with your maximum pupil dilalation. This table can help, but note that these figures are averages only so yours can be different. Also, you should note that dark adaptation needs to go into the equation. If you're not completely dark adapted (which normally can take up to 30 minutes), your pupil dilation will be less than these figures.
| Age (years) | Pupil Size (mm) |
|---|---|
| 20 or less | 7.5 |
| 30 | 7.0 |
| 35 | 6.5 |
| 45 | 6.0 |
| 60 | 5.5 |
| 80 | 5.0 |
So in general you don't want an eyepiece that gives a larger exit pupil than that table indicates because you're wasting light. However, you might be okay with that if your sole purpose for that eyepiece is for finding. In that case you might be fine with the loss of light if it gives you the desired wider FOV.
High Magnification
In theory any telescope can achieve almost any magnification. The raw beginner can easily think that if some magnification is good, a lot of magnification must be a lot better. And so important is the concept of really high power, so-called "department store" telescopes have been marketed with magnifications of 300X, 400X, and even more. The thing is they're not lying about the magnification because it will go to what they say. But the view at that power is pretty much useless ... other than convincing the disappointed beginner that high magnification is not necessarily your friend.
Here are some of the problems that go along with high magnification:
- Image becomes increasingly blurry
- Requires a larger / more massive mount
- Smaller field of view
- Makes objects dimmer
- Needs good collimation
- Need better / more expensive optics
Inverse Square Law
 When you're trying to understand the ramifications of high power you need to understand the inverse square law as the concept either directly applies
or is a corollary. The light from an object becomes fainter as it spreads out from the object in a predictable way. The light covers larger and larger
concentric spheres as you can see in the diagram. The dimming is simply the square of the distance. So an object will appear four times dimmer when it
is twice as far away. It will appear nine times dimmer when it is three times as far away. This relationship applies to magnification and the
performance of a telescope.
When you're trying to understand the ramifications of high power you need to understand the inverse square law as the concept either directly applies
or is a corollary. The light from an object becomes fainter as it spreads out from the object in a predictable way. The light covers larger and larger
concentric spheres as you can see in the diagram. The dimming is simply the square of the distance. So an object will appear four times dimmer when it
is twice as far away. It will appear nine times dimmer when it is three times as far away. This relationship applies to magnification and the
performance of a telescope.
Blurry Images
One of the most important factors limiting high power is the astronomical seeing conditions. Turbulent air causes the stars to twinkle and make images blurry. If you recall it is the purpose of the eyepiece to magnify the image formed by the telescope's object lens. If that image is already blurry because of the seeing, then all you are doing is magnifying the blur. The same thing goes for turbulence in the telescope tube if the temperature of the mirror and/or tube is not at the ambient or if you're looking too close over a house. At high power these become huge problems.
There is a rule of thumb that the magnification should never exceed 50X per inch of aperture. You can use this rule, but know that it depends on the seeing conditions and for 50X per inch the seeing has to be exceptionally great. 40X is a much better figure. But also at high power the exit pupil of the eyepiece is going to figure into the equation. At low power we saw that the exit pupil could be too large. At high power it's the opposite: the exit pupil can be too small. How small is too small? We are of the opinion that 1mm is pretty small and should be the lower limit. However, some authorities think it is 0.5mm. But think about that. The light cone coming out of the eyepiece is just half a millimeter! You can hopefully see that is so small the definition has to suffer and suffer substantially.
Let's take an example. We have a 6" f/8 reflector (Do = 152.4mm and fo = 1,219mm) and we wish to use a 6mm focal length eyepiece. That means the magnification is 203X. That seems very reasonable as it's only 34X per inch of aperture. However, running it through the exit pupil calculation (Do × fe ÷ fo = Dep) we get an exit pupil of just 0.75mm! So if you assume that you never go less than 1mm, if we solve for fe, we get: Dep × fo ÷ Do so 1mm × 1219mm ÷ 152.4mm = 8mm. So you really shouldn't use an eyepiece with a focal length less than 8mm.
Now let's compare that with a telescope with a 12" aperture. How much more light will that telescope gather compared to the 6"? It's really 4 times because the surface area of the 12" is 4 times greater. Let's say the 12" is an f/6 focal ratio so the aperture (Do) is 305mm and the focal length (fo) is 1829mm. Now let's say we're looking to match that 203X from the 6" example. We would only need a 9mm eyepiece. Run that through the formula and you'd get an exit pupil of 1.5mm! Obviously that is going to produce a much better image.
Requires a better mount
You can do a little experiment with your telescope. Even at low power (let's say 25X) if you simply tap on the tube very lightly you will see the image move. If you double the power to 50X, the motion becomes more pronounced, but it's not twice as much. It's 4 times as much. Double that to 100X and it's 4 times more (now 16 compared to 25X). Double that again to 200X and now you're up to 64 times. 400X you're now at 128 times. So at high power the mount becomes especially critical. If it's windy that will show up.
Smaller FOV
Though that obviously makes sense, it's probably worse than you think. That's because the field size obeys the inverse square law. So if you double the magnification, you're actually only seeing a quarter of the field.
Makes objects dimmer
As you magnify the image, it will become dimmer. That is because you're not putting more light into the system and once again the dimming follows the inverse square law. So if you double the magnification, you're actually dimming it by a factor of 4. So with the following progression you get 25X (1), 50X (4), 100X (16), 200X (64), and 400X (128). 400X is 128 times dimmer than it was at 25X. This is where a larger telescope helps because it brightens the image.
Need good telescope collimation
If you have a reflector, it needs to be in good to great collimation to get good focus, especially at high magnification. Collimation is the process of aligning the mirrors.
Better optics
Finally, the optics of your system have to be better. Both the telescope objective and especially your eyepieces become especially critical. And with short focal length eyepieces eye relief can be a real issue.
Medium Power
Medium power is simply the range between low and high power. It is often the optimal magnification range, but that's not always the case. In fact we can break things down further into 5 ranges: very low, low, medium, high, and very high. The table we present here shows the ranges and they are defined by the exit pupil for the eyepiece and that's regardless of the telescope objective size or the focal length. So the values for the first three columns are static, but the magnifying powers and eyepiece range do depend on the telescope objective size and the focal length. You should enter those numbers from your own telescope or one you're thinking of buying.

Where:
Do = Aperture (Diameter of the Objective)
Fr = Focal Ratio of the Objective
Magnification Table
Enter your own values for objective aperture and objective focal length.
Currently: Aperture (Do) = 152mm Focal Length (fo) = 1219mm
| Magn power range |
Exit pupil, mm |
Power per aperture inch |
Magn powers |
Eye- piece range |
Application Uses |
|---|---|---|---|---|---|
very low |
7.0-4.0 |
3.7-6.5X |
22-38X |
56-32mm |
Lowest usable power. Wide-field observing of DSOs in dark sky, locating objects. |
low |
4.0-2.0 |
6.5-12.8X |
38-76X |
32-16mm |
General observations, locating objects, observing most DSOs. |
med |
2.0-1.0 |
12.8-25.5X |
76-152X |
16-8mm |
Moon, planets, compact DSOs, wide double stars. |
high |
1.0-0.7 |
25.5-34X |
152-203X |
8-6mm |
Moon and planets (steady air), double stars, compact clusters, globulars. |
very high |
0.7-0.5 |
34-50.8X |
203-305X |
6-4mm |
Planets and close double stars (very steady air). |
Dealing With Dew
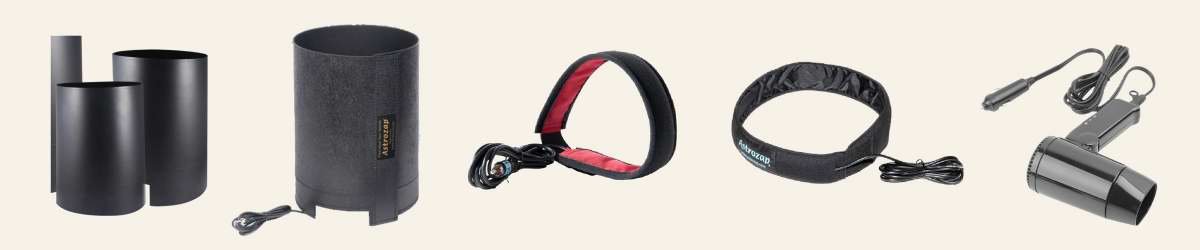
There are a number of ways to deal with dew and we show 3 of in the images above: dew shields, dew heaters, and blow dryers. The unacceptable way to deal with dew is to simply quit the observing session. That is the last thing you should do if it's otherwise a beautifully clear night. And unfortunately those beautifully clear nights usually have the atmospheric conditions that cause dew to form. So you have to learn how to deal with dew.
To understand why dew forms, you need to understand the dew point temperature. The air can only hold so much moisture, but it holds more and more with higher temperatures. But the opposite happens as it cools. If the temperatures falls below the dew point, moisture will appear. In the air this is fog. But sadly this happens much more quickly on your optics which cool down much faster than the air. So condensation will form on your optics long before the temperature ever reaches the dew point. The three solutions are dew shields, dew heaters, and blow dryers.
Dew Shields
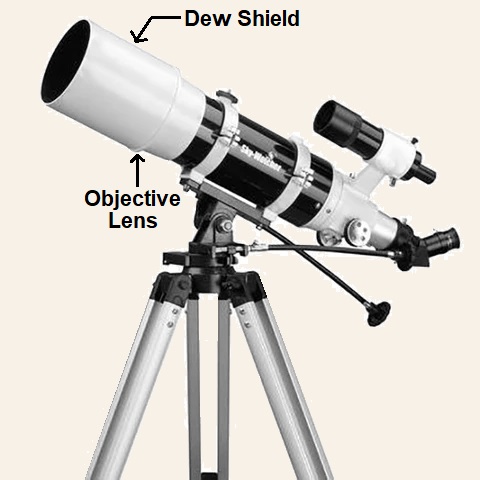
A very simple solution is a dew shield. This is simply a tube extension in front of the scope. Refractors and Catadioptric telescopes have lenses at the top of the tube and these are subject to dew. Refractors like the one shown at right almost always come with a dew shield. Having said that there are times when that tube extension is not far enough away and you have to further extend the tube or deal with dew in the other ways we will discuss below.
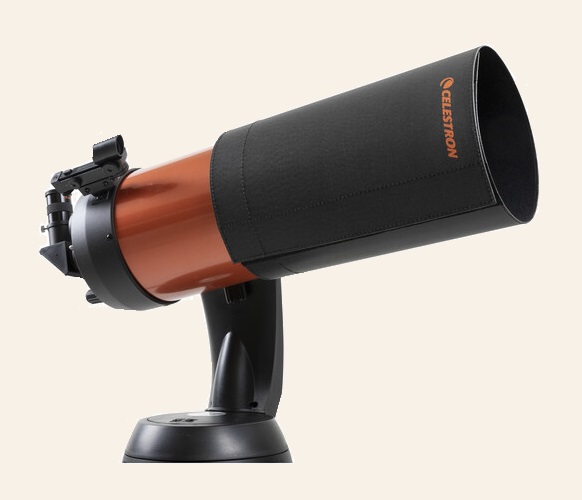 Schmidt-Cassegrain telescopes (the most popular catadioptric) have the corrector plate right at the end of the tube. Consequently, there is no
dew protection so you will have to deal with it applying one of the 3 solutions. As shown in the photo at the left the tube has been outfitted
with a dew shield which, again, is simply a tube added.
Schmidt-Cassegrain telescopes (the most popular catadioptric) have the corrector plate right at the end of the tube. Consequently, there is no
dew protection so you will have to deal with it applying one of the 3 solutions. As shown in the photo at the left the tube has been outfitted
with a dew shield which, again, is simply a tube added.
One type of telescope that really doesn't suffer from dewing is a Newtonian Reflector with a solid tube. Since the mirror is at the bottom it's as if it has a very long dew shield. But as truss tube models have appeared these telescopes will also suffer from dew.
Dew Heaters
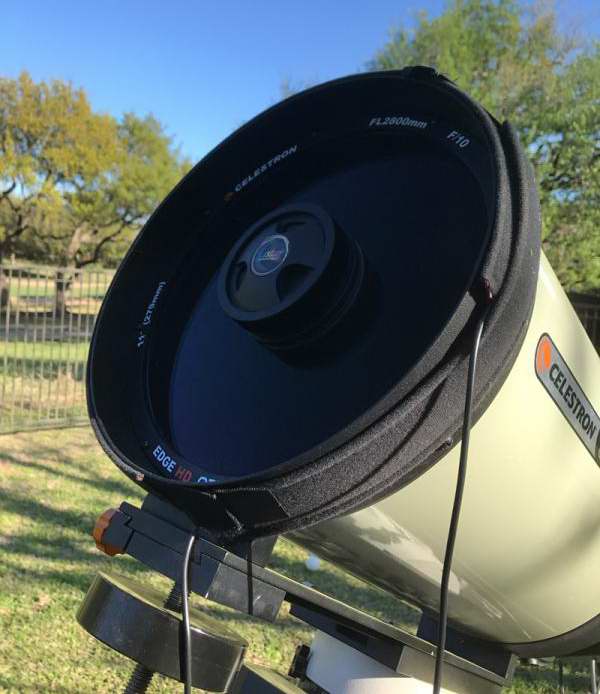 Since dew forms on optical surfaces because they get colder than the ambient temperature and less than the dew point, a very effective solution
is to use a heater which is often a strip when you're talking about commercial products. The strip is usually placed around the tube as close
as possible to were the glass objective or corrector is located.
Since dew forms on optical surfaces because they get colder than the ambient temperature and less than the dew point, a very effective solution
is to use a heater which is often a strip when you're talking about commercial products. The strip is usually placed around the tube as close
as possible to were the glass objective or corrector is located.
When we say "heat" we're not talking hot. You only need to raise the temperature of that front objective / plate to just a few degrees warmer than the ambient. That is all it takes to keep dew from forming. Too much heat should be avoided because that will degrade your image.
The downside of this method is the need for electrical power. Most of the strips available are 12V because many want to utilize their car batteries. If you don't have a car than you will need a 120V to 12V converter.
Blow Dryers
The final way to deal with dew is to use a blow dryer. Of course they're available as 120V devices when used in a bathroom, but they are also readily available in 12V. Some of these are pretty powerful, but it's not needed. You simply want to raise the temperature of the objective / glass.
Eyepiece Dew
Your eyepieces are also subject to dew. Here a blow dryer works perfectly fine, but many observers use a very simple solution. They keep the eyepieces they're using in their pockets when not in use. This works great because it raises the temperature of the eyepiece but not excessively.
Newtonian Reflector Collimation
 If you have a Newtonian reflector, you will need to occasionally collimate the the main and diagonal mirrors for optimal performance.
Collimation (sometimes called alignment) used to be an operation that could be adequately performed with no accessories. But that was with f/8 and longer. Today's reflectors have much shorter focal lengths and consequently collimation is far more critical, requiring an accessory such as a Cheshire Collimator (shown in the photo) or a laser collimator.
We have two excellent links on how to perform this task:
Gary Seronik - A Beginner's Guide to Collimation
Sky & Telescope - How to Align Your Newtonian Reflector Telescope
Cleaning Your Optics
Though you will want to do whatever you can to prevent the buildup of dust and dirt on your optics, eventually they will need to be cleaned. Though we are going to give you a link on this topic, we must state that this is something that should be done sparingly. This is especially the case with a mirror in a Newtonian reflector. The mirror will still perform well even though there seems to be a significant amount of dust / dirt. Especially in the case of your primary mirror, you can do significant damage if done too often and/or not carefully done.
Sky & Telescope - How to Care for Your Telescope Optics the Right Way
Light Pollution Filters
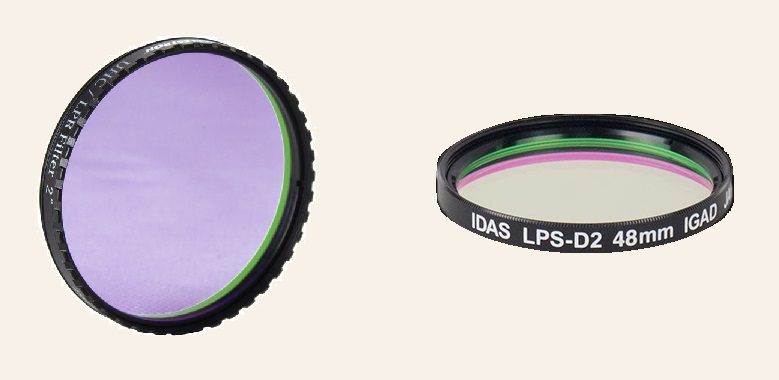 Light Pollution Reduction (LPR) filters can be a very good accessory if you will be observing a lot in light polluted areas. So, obviously, all
urban and most suburban areas. These filters are threaded to onto your eyepieces at the bottom of the barrel utilizing the threads placed there for the purpose
of holding filters. Consequently, the filters are available in 1.25" and 2" sizes so you'll have to match this with the eyepieces you want.
Light Pollution Reduction (LPR) filters can be a very good accessory if you will be observing a lot in light polluted areas. So, obviously, all
urban and most suburban areas. These filters are threaded to onto your eyepieces at the bottom of the barrel utilizing the threads placed there for the purpose
of holding filters. Consequently, the filters are available in 1.25" and 2" sizes so you'll have to match this with the eyepieces you want.
But that is not good enough for you to immediately buy an LPR filter. You have to understand how they work so you know if 1) they will work where you'll be doing your observing, and 2) you get the right type. It is important to know that despite the name LPR's do not block all light pollution. They are engineered to block just certain wavelengths of light, the ones emitted from most outdoor lighting. Most light pollution still comes from high-pressure sodium vapor (the yellowish-orange lights) and somewhat from mercury-vapor lamps. These filters block those specific light wavelengths and allow all other light through. As such they are considered broadband filters. So if your light pollution is coming from regular incandenscent lighting these filters will not work. The other things that you need to know is these can only help with DSO's (not stars) and they don't actually make these objects brighter. But when they work they increase the contrast so that they can appear more apparent.
But so far we've only talked about "classic" LPR's. Over time older sodium vapor and mercury vapor fixtures are being replaced with LED lighting. If this is the primary source of your light pollution (and over time it will grow as more communities convert) then you need a different type of LRP designed to block the excessive blue light.