Stargazing
A Handbook for Night Sky Tour Guides
 These
are tried and proven blueprints for guiding your companions
through the mysterious
These
are tried and proven blueprints for guiding your companions
through the mysterious depths of the night sky.
Each tour follows a plan that mixes astronomy, legends, and the immediate beauty of the
stars to create a lively and interesting stargazing experience. Whether
you are educating your campers or impressing your date, these sky tours
offer a broad selection of celestial gems that you can use.
depths of the night sky.
Each tour follows a plan that mixes astronomy, legends, and the immediate beauty of the
stars to create a lively and interesting stargazing experience. Whether
you are educating your campers or impressing your date, these sky tours
offer a broad selection of celestial gems that you can use.
This entire section of our website is compliments of MAS member Randy Culp. He wrote this for his own website and notes that there are several mirror sites (copies, which he takes as a compliment). His site will be continually up to date and improved, but we hope ours will be as well.
Index to the Tours
Click on the symbol for the season to go to that tour. Click on the symbol while you're in the tour to come back to this page.
Note that each tour stands by itself. They all cover the same fundamental astronomy principles, each in its own way according to what's up for the season.
 |
Spring Sky TourMarch, April, & May |
| Auriga | Gemini | Bootes |
| Cancer | Hydra | Corvus |
| Crater | Leo | Ursa Major | Ursa Minor | Draco | Virgo |
| Coma Berenices | Canis Minor | Corona Borealis |
| Canes Venatici |
 |
Summer Sky TourJune, July, & August |
| Ursa Major | Ursa Minor | Cassiopeia |
| Bootes | Canes Venatici | Draco |
| Virgo | Cepheus | Sagittarius |
| Ophiuchus | Serpens | Scorpius |
| Aquila | Cygnus | Sagitta | Delphinus | Equuleus | Lyra |
| Hercules | Corona Borealis |
 |
Autumn Sky TourSeptember, October, & November |
| Andromeda | Perseus | Cassiopeia |
| Cepheus | Pegasus | Cetus |
| Capricornus | Aquarius | Pisces |
| Aries | Triangulum | Piscis Austrinus |
| Cygnus | Aquila | Little & Big Dipper | Delphinus | Sagitta | Lyra |
| Equuleus | Draco |
 |
Winter Sky TourDecember, January, & February |
| Orion | Taurus | Auriga |
| Ursa Major | Ursa Minor | Andromeda |
| Perseus | Lepus | Canis Major |
| Canis Minor | Gemini | Leo |
| Cancer | Aries | Triangulum | Cetus | Cassiopeia | Cepheus |
 Index to the Constellations
A Summary of the Constellations and the Features of Each
Index to the Constellations
A Summary of the Constellations and the Features of Each
Judging the Sky by Eye
How to Gauge the Clarity of Your Night Sky Using the Constellations
Star Hopping
A method to find celestial objects
Recommended Equipment - By Randy Culp
- Reference Guides
The single best book to have is the Audubon Society Field Guide to the Night Sky. I have over 40 books on astronomy and I find I keep going back to this one. Plus it fits in your back pocket.
Also handy is Orion DeepMap 600 which can be found at www.telescope.com. A nice view of the entire night sky in a single shot.
Note that you want these for preparation in advance. If you plan on referencing them while you're stargazing, bring along a red LED flashlight, which will prevent you from destroying your night vision once your eyes are dark-adapted.
- Flashlight
You don't want this for seeing so much as you want it for pointing out stars and tracing out constellations. You therefore want one with a highly focused beam that will give you a searchlight shaft into the night sky. (If you can afford a green laser pointer - these are much cooler and more high-tech than a flashlight - just be careful where you point it. Obviously not at buildings, cars, or aircraft, but also make sure a nearby astronomer is not trying to get an image while you're waving your laser, or flashlight, around.)
- Binoculars
The single most versatile instrument for astronomy is a pair of 10x50 binoculars. They're small and light so they can go on any outing, and they're powerful. In fact, a little too powerful -- at 10x magnification you need to control the shaking from your hands to get the full resolving power of the image. (Some people prefer 7x50 or 8x50 for this reason.) Laying on your back, bracing the binoculars with your hands against your face, works really well for steadying out the shaking. You can also get a tripod mount for most binoculars.
Decent ones (Meade, Celestron, Orion, Bushnell) will go for around $50, excellent ones will go for as much as ten times that (or more of course). Avoid the cheap ones (think of how much you can see through those magnifying glasses from cereal boxes).
- Telescope
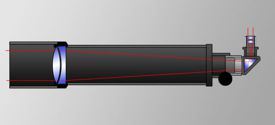
Only if you really think you need it. For stargazing purposes you won't use it extensively, although it can add a nice touch. Decent ones start at around $150, and the prices for good ones quickly skyrocket from there -- from $400 to $1000 for a nice and reasonably mobile instrument. The diameter of the objective lens, which is the most important dimension of a telescope, needs to be greater than 3 inches for the telescope to do much good.
The telescope I use is a Meade ETX (the original, with a 3.5" objective). I have it on every campout because it's compact and travels well. For more challenging targets (and more impressive telescope images) we rely on one of the dads who occasionally brings along a 10-inch scope.
The tours are just fine without a telescope at all. I include the telescope objects in case you have access to one and you really want to use it. If you don't use it, no one will miss it. In fact, even though I usually have binoculars handy for stargazing (and personally I really like them), I have found that the tours are just fine with no optical aids at all. We're stargazing, here, after all.
If you are really interested in understanding the physics of a telescope, assessing, predicting, and comparing telescope performance, you can go to my personal web site on telescope equations:
You can also find a very comprehensive treatment of telescope physics here.
 Telescope Equations
Planets - By Randy Culp
- The planets are often conspicuous and will usually draw a question from
somebody, along the lines of "What's that bright one over there?" So...
check in advance and identify which planets are going to be up, and where
they will be.
- No one will notice Mercury, so you will need to actively hunt it down and
point it out. It is a tricky one and needs to be at or near its greatest
separation from the sun. You need to catch it at the right time of twilight
-- too early and the sky is too bright to see it, too late and it's lost to
the horizon. My experience is that there is a window of about 10 to 20
minutes - at best - in which Mercury can be seen -- but it is a worthwhile
pursuit. Finding and catching Mercury can be an adventure in itself.
- Mercury, Venus, and Mars make their best impression, from a stargazing point
of view, by eye -- the telescope does not add a great deal unless you are
quite serious about your astronomy. However, if Jupiter or Saturn, or both,
are visible then either will make a good showing in the telescope -- Saturn
for its rings, Jupiter for its bands, and either for its moons.
Hence if you expect to have Jupiter or Saturn in the sky it is also worthwhile to do a little homework (see links below) and determine where the moons will be positioned. This varies hour by hour so you need to be precise about when you will be showing it. We once had a moon pop out of nowhere -- Io was emerging from behind Jupiter as we were observing (very cool).
- Magazines such as Astronomy or Sky & Telescope will give you planet positions, as well as positions of Jupiter's moons (Sky & Telescope also shows Saturn's moons). You can also get software that will give you this information. A good web-based Javascript program for locating Jupiter's Moons is available at Sky & Telescope Jupiter JavaScript and a similar one for Saturn's moons is available at Sky & Telescope Saturn JavaScript. A listing of available software can be found at Sea and Sky. Personally I use Starry Night and The Sky astronomy software.
- Mars -- My presentation on Mars, recorded during the October Membership Meeting of the Milwaukee Astronomical Society held on 10-19-2020 via Zoom.
Pointers
The luminous beauty of the night sky has a presence that is overwhelming, and commands the attention of your tour group. This spectacular display does all the work -- our added value to the tour group is when we reveal to their eyes the things they otherwise would not have seen, noticed or appreciated. So stargazing is show and tell, with emphasis on the "show" and less on the "tell". These tours are designed to support that approach. Some pointers:
- I have found that deep sky objects that are not visible (or barely visible) to
the naked eye and pop out in the binoculars are a particular delight. A couple
of classic examples are the Coathanger in the summer sky and the Beehive in the
Winter/Spring sky. Some other similar goodies are the Double Cluster (winter),
the Double-Double (summer), M13 (summer), and the Andromeda galaxy (fall/winter).
- Focus only on what is easily visible. Extremely faint and challenging objects
are best left for later, when you are testing the limits of your telescope with
the hard-core crowd. Galaxies, in particular, look spectacular in photographs
and fall well short of those images in the telescope. Aside from the Andromeda
galaxy and M81, galaxies require a crystal-clear, dark sky, or a big telescope
(8 inches or larger), and preferably both.
- Attach a story to each celestial feature you point out. Answer the question of
why your friends care that they can see it.
- Hit the high points quickly and early, because the night chill and fatigue of
the day will get to the crowd. Even under the best circumstances you will
gradually lose more and more of your budding astronomers as the evening wears on.
- If you are going to use a telescope for any part of your tour, it's best to
have someone help by finding the next target in the telescope for you while
you are showing and explaining other items of interest.
If you are going to direct stargazing and point the telescope too, practice finding those objects until you can do it quickly & easily. Practice on your own, well beforehand. Optimally you will practice on several nights under different conditions. If you're used to your light-polluted back yard and you get out under a dark sky full of stars you hadn't been seeing before, that can present a time-consuming challenge that will test the patience of your tour group (not a good tour feature).
- You don't need to cover everything. Most stargazing sessions I lead with Scouts or otherwise, are spur-of-the-moment affairs prompted by the abrupt realization that we are under a perfect, clear, dark sky. As a result, while we have covered all the items of all these tours at one time or another, I doubt I've ever conducted a stargazing tour where I hit every single solitary item on the list. Rather, I follow the general flow and outline of the tours and allow the discussion to follow the interests of the group. As you might imagine, that seems to work out best.
Questions
Your questions and comments regarding the Stargazing section are welcome.
You can e-mail the author, Randy Culp for inquiries,
suggestions, new ideas or just to chat.
Updated 18 July 2023